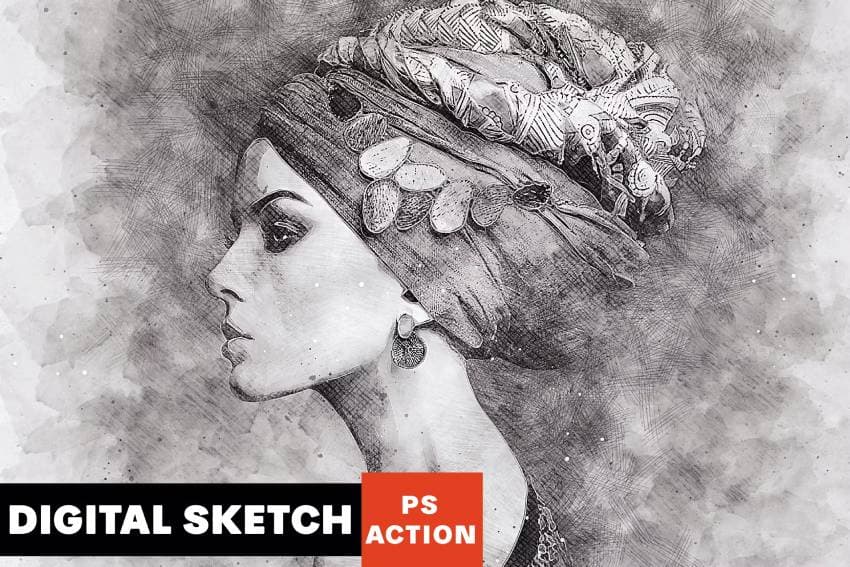
In this tutorial, I'll teach you how to create a Photoshop sketch effect. You'll learn how to convert an image to a sketch in Photoshop in a few steps.
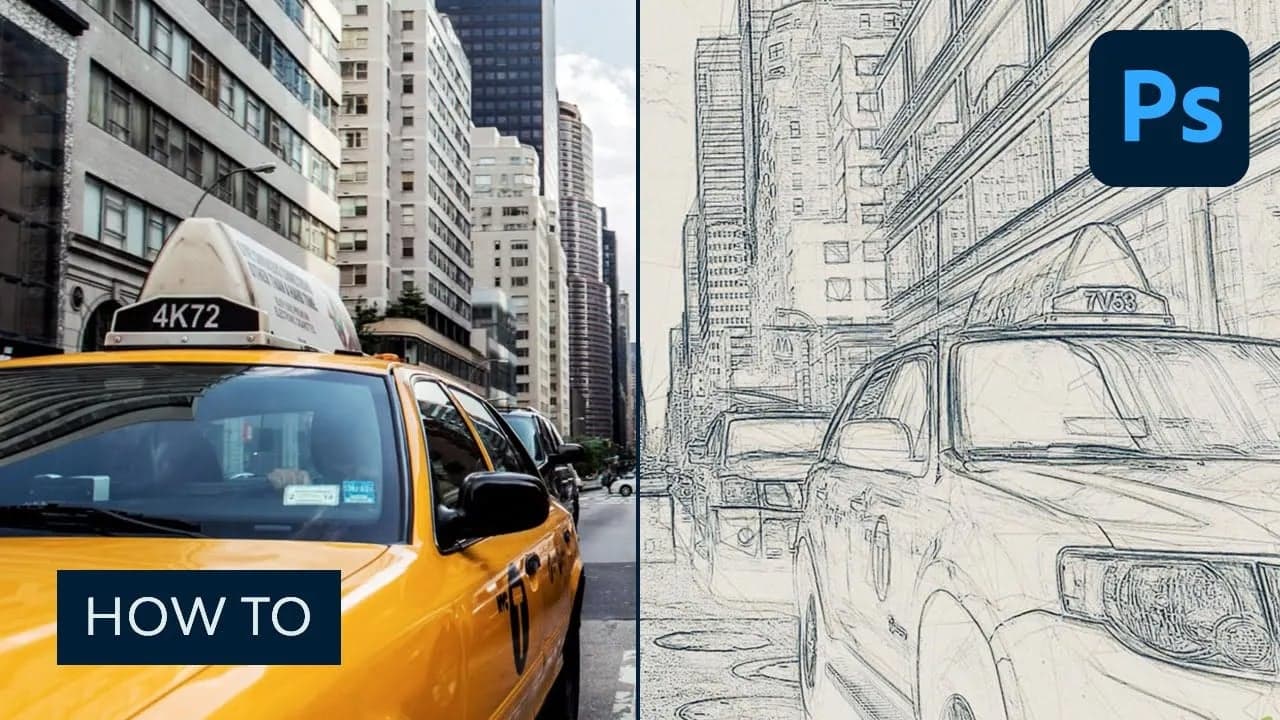
Did you know you can use Photoshop for drawing? Would you like to learn how to convert an image to a sketch in Photoshop through a video? Then follow along with us over on the Envato Tuts+ YouTube channel:
What You’ll Need
To turn an image into a drawing, you won’t need much. You’ll just need a stock image of a taxi cab. You can grab one from Envato Elements as part of your subscription to the unlimited creative asset service.
1. How to Set Up the Workspace
First, open the photo that you want to work with. To open your photo, go to File > Open, choose your photo, and click Open. Now, before we get started on the Photoshop sketch effect, just check a couple of things:
- Your photo should be in RGB Color mode, 8 Bits/Channel. To check this, go to Image > Mode.
- For best results, your photo size should be between 1500–4000 px wide/high. To check this, go to Image > Image Size.
- Your photo should be the Background layer. If it is not, go to Layer > New > Background from Layer.
- To make some auto-corrections to your photo tone, contrast, and color, go to Image > Auto Tone, Image > Auto Contrast and then Image > Auto Color.

2. How to Create the Background
For the sketch filter Photoshop effect, we are going to use a solid color fill. Go to Layer > New Fill Layer > Solid Color to create a new solid color fill layer, name it ‘Background Color‘ and enter the settings below:

3. How to Create the Base Sketch
Step 1
We’re in the process of turning a picture into a drawing. Now we are going to create the base sketch. Select the Background layer and go to Layer > New > Layer Via Copy to duplicate the Background layer, and then drag that new layer to the top of the layers in the Layers panel. Press D on your keyboard to reset the swatches and go to Filter > Filter Gallery > Sketch > Photocopy and choose the settings below:

Step 2
Name this layer Base Sketch and change its blending mode to Multiply.

4. How to Create a Draft Sketch Effect
Step 1
Now we are going to create a draft Photoshop sketch filter. Go to Layer > New > Layer Via Copy to duplicate the Base Sketch layer. Pick the Lasso Tool (L), click anywhere inside the canvas, choose Free Transform, and increase the width and height to 105% as shown below:

Step 2
Name this layer Large Draft Sketch and set its Opacity to 14%.

Step 3
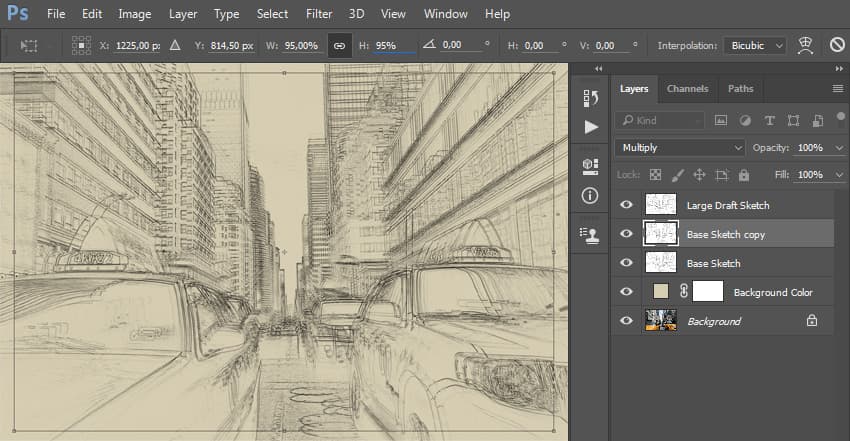
Select the Base Sketch layer and go to Layer > New > Layer Via Copy to duplicate the Base Sketch layer again. Pick the Lasso Tool (L), click anywhere inside the canvas, choose Free Transform, and decrease the width and height to 95% as shown below:
Step 4
Name this layer Small Draft Sketch and set its opacity to 14%. Turning a picture into a drawing isn’t complicated at all.

5. How to Create a Rough Sketch Effect
Step 1
The next step in learning how to turn a picture into a drawing is creating a rough sketch. Select the Background layer and go to Layer > New > Layer Via Copy to duplicate the Background layer, and then drag that new layer to the top of the layers in the Layers panel. Go to Filter > Filter Gallery > Artistic > Cutout and choose the settings below:

Step 2
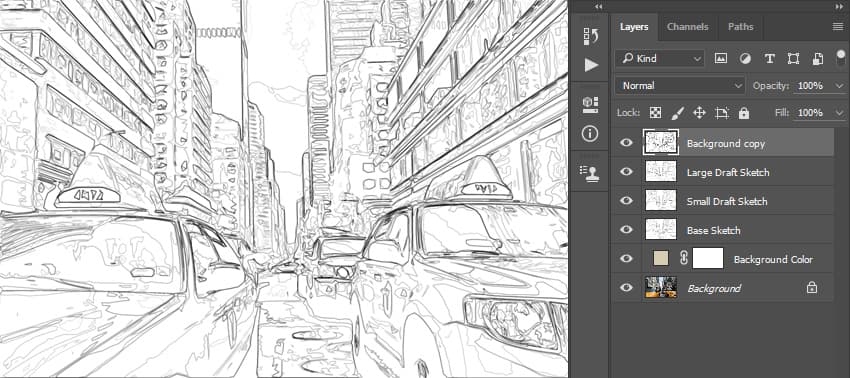
Go to Filter > Stylize > Find Edges and then go to Image > Adjustments > Desaturate.
Step 3
Name this layer RS_1, change its blending mode to Color Burn, and drop its Opacity to 30%.

Step 4
Now we are going to create more rough sketch layers using the same method. So repeat Step 1 and Step 2 in this section, but in Step 1 instead of using the settings we used the previous time, use the new settings below:

Step 5
Name this layer RS_2, change its blending mode to Color Burn, drop its Opacity to 25%, and drag it under the RS_1 layer to keep the proper layer order.

Step 6
Again repeat Step 1 and Step 2 from this section, but in Step 1, instead of using the settings we used previously, use the new settings below:

Step 7
Name this layer RS_3, change its blending mode to Color Burn, drop its Opacity to 20%, and drag it under the RS_2 layer to keep the proper layer order.

Step 8
Again, repeat Step 1 and Step 2 from this section, but in Step 1, instead of using the settings we used previously, use the new settings below:

Step 9
Name this layer RS_4, change its blending mode to Color Burn, drop its Opacity to 20%, and drag it under the RS_3 layer to keep the proper layer order.

Step 10
Again, repeat Step 1 and Step 2 from this section, but in Step 1, instead of using the settings we used previously, use the new settings below:

Step 11
Name this layer RS_5, change its blending mode to Color Burn, drop its Opacity to 18%, and drag it under the RS_4 layer to keep the proper layer order.

Step 12
For the last time, repeat Step 1 and Step 2 from this section, but in Step 1, instead of using the settings we used previously, use the new settings below:

Step 13
Name this layer RS_6, change its blending mode to Color Burn, drop its Opacity to 7%, and drag it under the RS_54 layer to keep the proper layer order.

Step 14
Now we are going to group all these rough sketch filter layers. While the layer RS_6 is selected, Shift-click on the RS_1 layer to select these two layers and all other layers between them. Then go to Layer > New > Group from Layers to create a new group from the selected layers and name it Rough Sketch.

6. How to Create Shading
Step 1
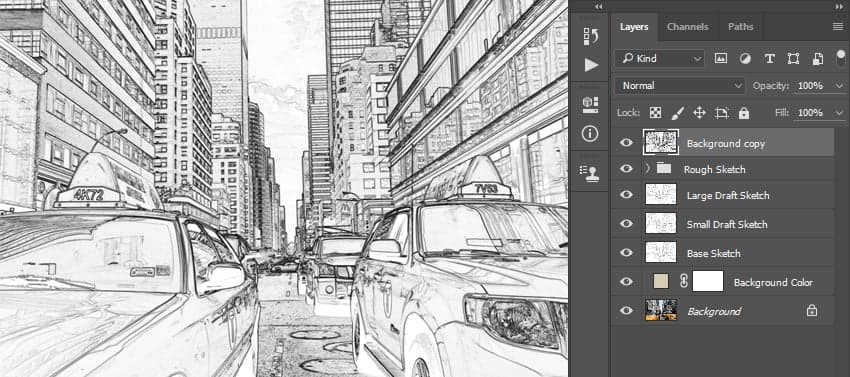
Now we are going to create some subtle shading for this photo to sketch effect in Photoshop. Select the Background layer and go to Layer > New > Layer Via Copy to duplicate the Background layer, and then drag that new layer to the top of the layers in the Layers panel. Go to Filter > Stylize > Find Edges and then go to Image > Adjustments > Desaturate.
Step 2
Go to Filter > Filter Gallery > Brush Strokes > Angled Strokes and select the settings below:

Step 3
Name this layer Shading_1, change its blending mode to Multiply, and drop its Opacity to 12%.

Step 4
Now repeat Step 1 from this section, and then go to Filter > Brush Strokes > Crosshatch and enter the settings below:

Step 5
Name this layer Shading_2, change its blending mode to Multiply, drop its Opacity to 5%, and drag it under the Shading_1 layer to keep the proper layer order. The picture to drawing tutorial is coming along nicely!

7. How to Add Noise
Step 1
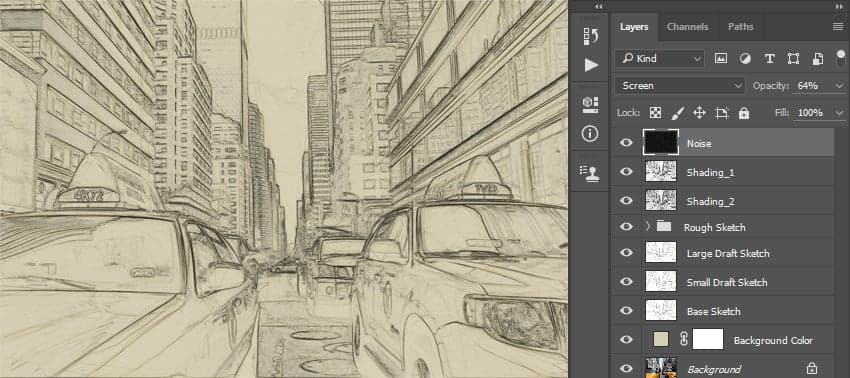
In this step, we are going to add some noise to our photo to sketch Photoshop design. Select the Shading_1 layer and go to Layer > New > Layer to create a new layer and name it Noise.

Step 2
Now press D on your keyboard to reset the swatches. Go to Edit > Fill and enter the settings below:

Step 3
Go to Filter > Noise > Add Noise and choose the settings below:

Step 4
Now change this sketch filter layer’s blending mode to Screen and drop its Opacity to 64%.
8. How to Create the Color Look
Step 1
Now we are going to add a nice color look to our Photoshop drawing project. Go to Layer > New Adjustment Layer > Curves to create a new curves adjustment layer and name it Color Look.

Step 2
Double-click on this layer thumbnail and enter the following settings:

9. How to Make the Final Adjustments
Step 1
Now we are going to make some final adjustments to our photo to sketch effect in Photoshop. Go to Layer > New Adjustment Layer > Photo Filter to create a new photo filter adjustment layer and name it Photo Tint.

Step 2
Double-click on this layer thumbnail and select the following settings:

Step 3
Now we are going to add contrast. Press D on your keyboard to reset the swatches. Go to Layer > New Adjustment Layer > Gradient Map to create a new gradient map adjustment layer and name it Overall Contrast.

Step 4
Change this sketch Photoshop layer’s blending mode to Soft Light and drop the Opacity to 18%.

Step 5
Now we are going to add some vibrance and saturation to the Photoshop pencil sketch filter. Go to Layer > New Adjustment Layer > Vibrance to create a new vibrance adjustment layer and name it Overall Vibrance/Saturation.

Step 6
Double-click on this Photoshop sketch effect layer thumbnail and choose the following settings:

Step 7
Now we are going to boost the highlights slightly. Go to Layer > New > Levels to create a new levels adjustment layer and name it Overall Brightness.

Step 8
Double-click on this layer thumbnail and choose the following settings:

Step 9
Now we are going to add sharpening. Press Control-Alt-Shift-E on your keyboard to make a snapshot. Go to Filter > Other > High Pass and enter the settings below:

Step 10
Name this layer Overall Sharpening, change its blending mode to Hard Light, and drop the Opacity to 76%.

You Learned How to Turn a Picture Into a Drawing!
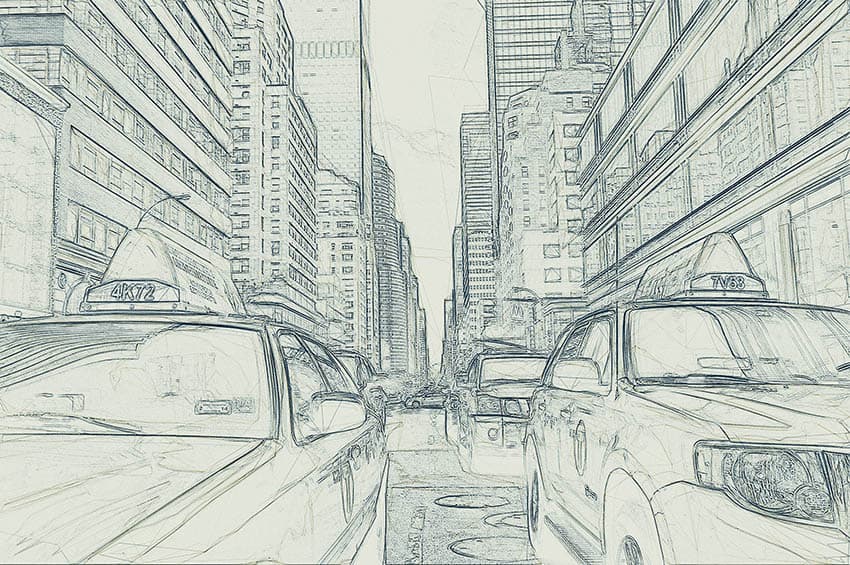
Congratulations, you have succeeded! Here is the final result of our finished sketch filter Photoshop design:
Customize Your Results
You can now customize the final sketch effect in Photoshop. I will give you a few tips:
- Select the Background Color layer, double-click on its thumbnail, and in the Color Picker panel, choose another color. Click OK.
- Select some of the layers and play with their opacities to create different Photoshop pencil sketch effects.
- Select the Color Look layer, double-click on its thumbnail, and in the Properties panel, change the settings for a different color look.
- Select the Photo Tint layer, double-click on its thumbnail, and in the Properties panel, change the settings for a different color look.
- Select the sketch Photoshop layer Overall Contrast and change its opacity to adjust the contrast.
- Select the layer Overall Vibrance/Saturation, double-click on its thumbnail, and in the Properties panel, play with the Vibrance and Saturation values to create different results.
- Select the layer Overall Brightness, double-click on its thumbnail, and change the settings to adjust the brightness.
- Select the layer Overall Sharpening, and change its opacity to adjust the amount of sharpening.
Here is what I got:

If you would like to create an even more advanced sketch with a paint effect as shown below, and just by using a single click, then check out the TechnicalArt sketch Photoshop action. The action works so that you just brush over the areas that you want to remain in paint, play the action, and the action will do everything for you, giving you fully layered and customizable results.
Top Sketch Photoshop Actions From Envato Elements
If you’re looking to take your projects even further in less time, a sketch Photoshop action will do just the trick. The options from Envato Elements are simple to use and have professional results. Check out a few of them here to turn a photo into a sketch in Photoshop:
1. Concept Sketch Photoshop Action (ABR, ATN, PAT)
Looking for a realistic Photoshop sketch filter? This action will help you turn an image into a drawing in a few clicks. This sketch filter action includes 12 different brushes and 18 patterns, and it’s so easy to use that you’ll get incredible and realistic results every time.
2. Digital Photoshop Pencil Sketch Effect Action (ATN, ABR, PAT)
This cool sketch filter creates a stunning Photoshop sketch effect. Once you run Digital Sketch, you’ll get an artistic result that has fully editable layers, colors, and elements. That means you can customize your photo to sketch effect in Photoshop without much fuss.
3. Colorful Sketch Effect in Photoshop (ATN, ABR, PAT)
Not every sketch needs to come in black and white. This cool sketch effect Photoshop action lets you add some color to your artistic work. Even though it’s easy to use, the sketch Photoshop action also comes with a video tutorial in case you need help.
4. Sketch Photoshop Action (ATN, ABR)
The results of this Photoshop sketch action are a sight to behold. The fine details found here look handmade. It’s also pretty simple to use. Just brush the area where you want the Photoshop pencil sketch effect applied and play.
5. Rough Sketch Photoshop Action (ATN, ABR, PAT)
Take advantage of Photoshop for drawing with this action! If you’re looking for sketches that are rougher around the edges, this is the perfect choice for you. This sketch Photoshop action captures the essence of your photos with a raw art style. One cool feature of this download is that it creates ten sketch variations for you to choose from.
Explore More Photoshop Resources and Tutorials
Did this photo to sketch Photoshop how-to guide pique your design interest? Then check out the following sketch effect tutorials:


